The guide starts after the hardware installation by the installation service provider. Below are all the necessary steps to connect the gateway with the Charge Repay Service.
The contents are also described in the german manual: um_de_crg_0002_xx_1.pdf
1. Connection
The gateway is powered by a +12V DC (3A, 36W) power supply. To connect, follow these steps:
- Connect the supplied power supply to the gateway (No. 3 in the connection side diagram). If necessary, the power supply must be connected to a supplied wiring harness, which is then connected to the gateway.
- Plug the power supply into a grounded outlet.
Also, connect the RS485 cable installed by the installer.
2. Connecting to the Internet
Depending on the circumstances, you have received either an LTE or WiFi gateway. You can find out which type you have on the label on the box or gateway.
2.1 Connecting the LTE Gateway
If you have a WiFi gateway, please skip this section.
Once the gateway is powered, it will start booting and attempt to connect to the internet via cellular network.
If no cellular connection can be established, the gateway will open a hotspot, and you can alternatively proceed with Section 2.2 .
2.2 Connecting the WiFi Gateway
Start the gateway; after about two minutes, the gateway is ready and opens a WiFi hotspot. This can be recognized when the status LED blinks twice for 0.25s every 3s. Open the WiFi settings on your mobile phone. Connect to the following network:
Name: CHARGE_Repay_Gateway-****
Password: The password can be found on the underside of the gateway or the attached sticker.
Once the gateway has started and your mobile phone is connected to the hotspot, open the following link in your web browser:
| Instruction | Screenshot |
|---|---|
| 1. Enter the password (same as the hotspot password). This can be found on the underside of the gateway or on the attached sticker. | 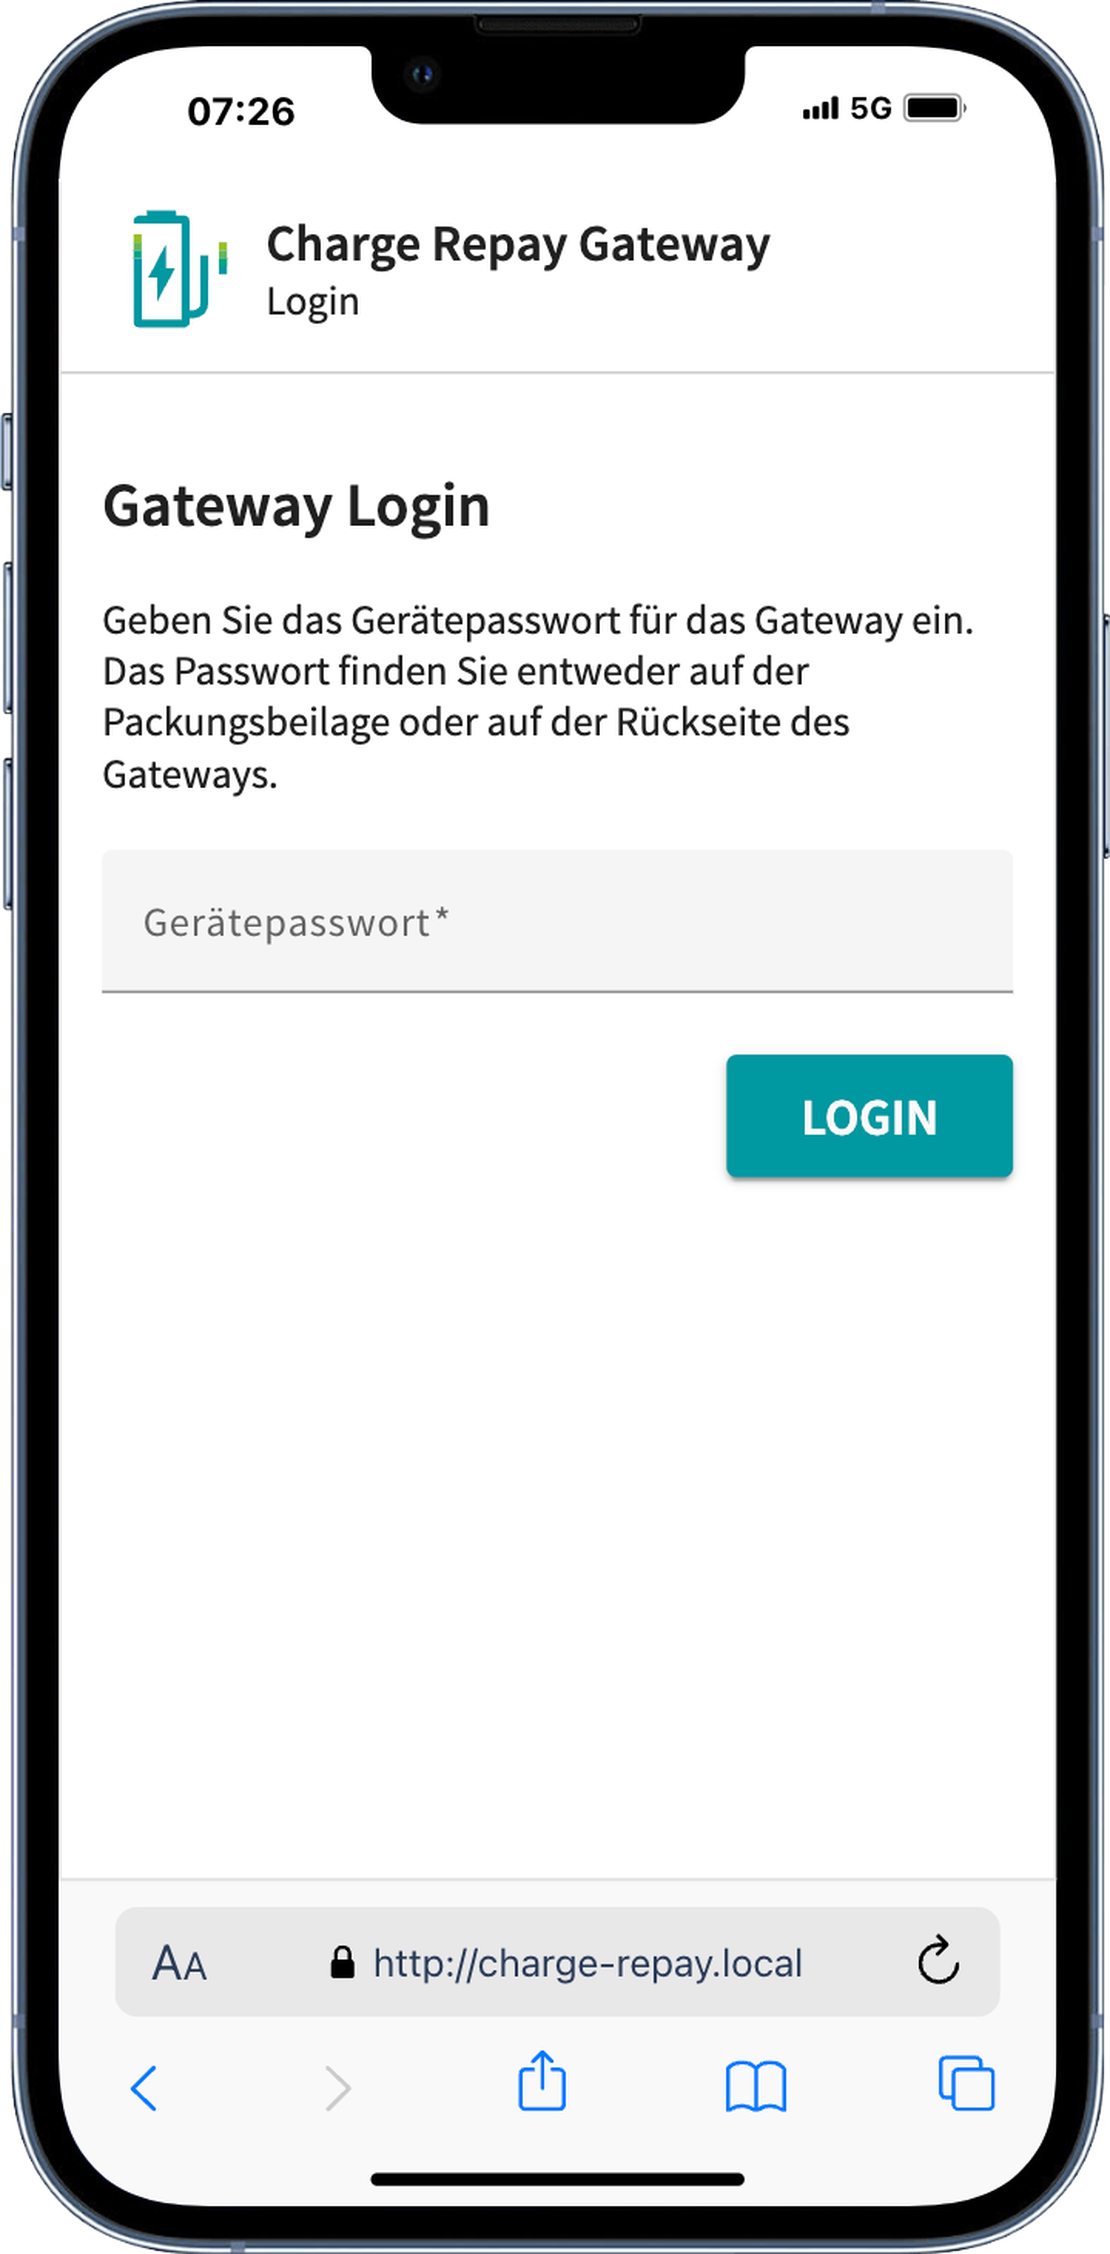 |
| 2. Connect the gateway to your WiFi. Select your home WiFi and enter the corresponding password. Once you click “VERBINDEN” the gateway will connect to the configured WiFi. Upon successful connection, the gateway will close the hotspot. Your mobile phone should automatically reconnect to the configured home WiFi. If this does not happen, please manually switch to it. The page in the browser must remain open. | 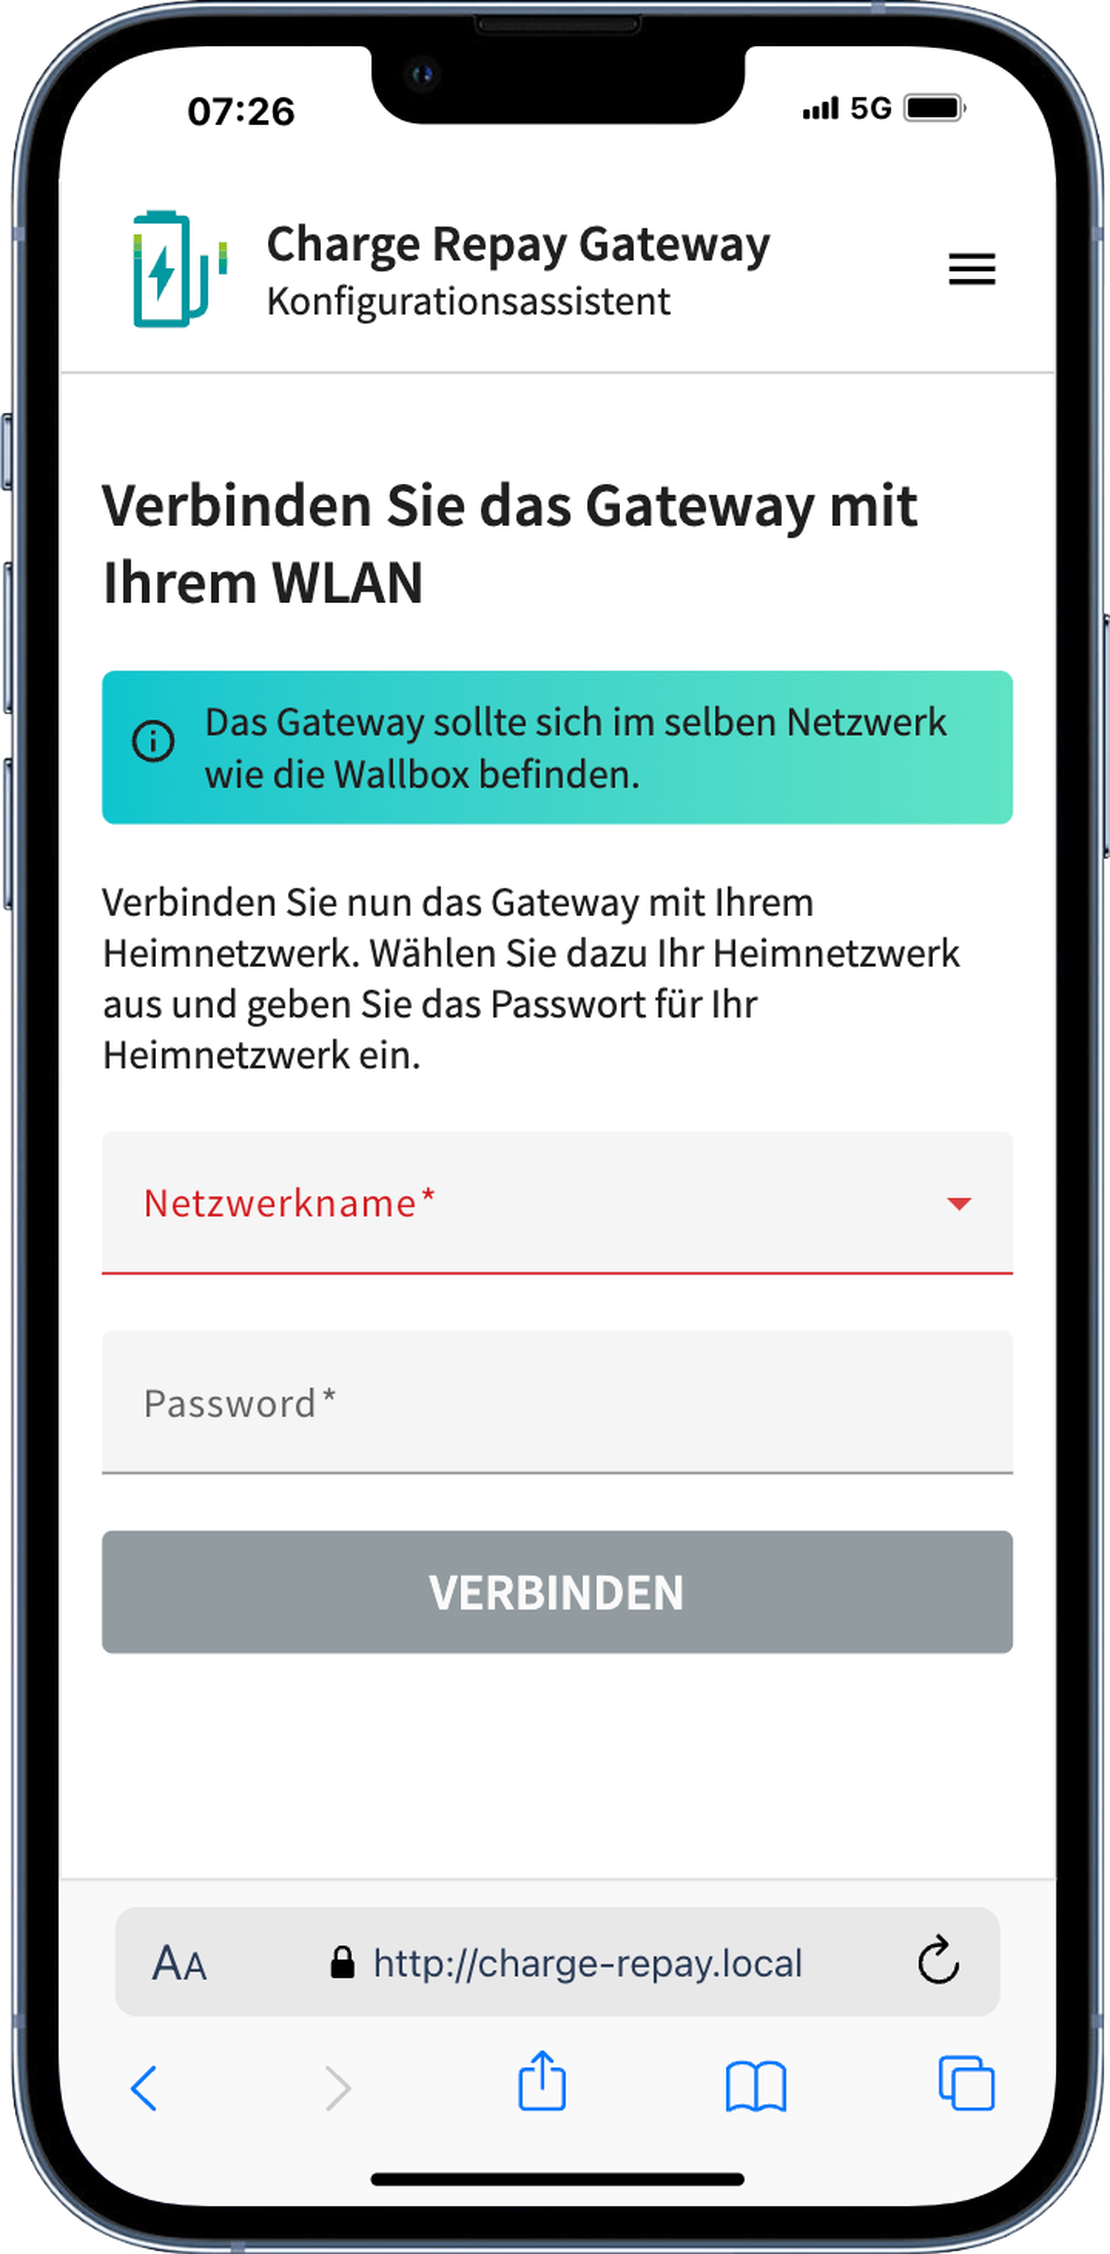 |
| 3. After a successful connection, your current configuration will be displayed. Confirm this. | 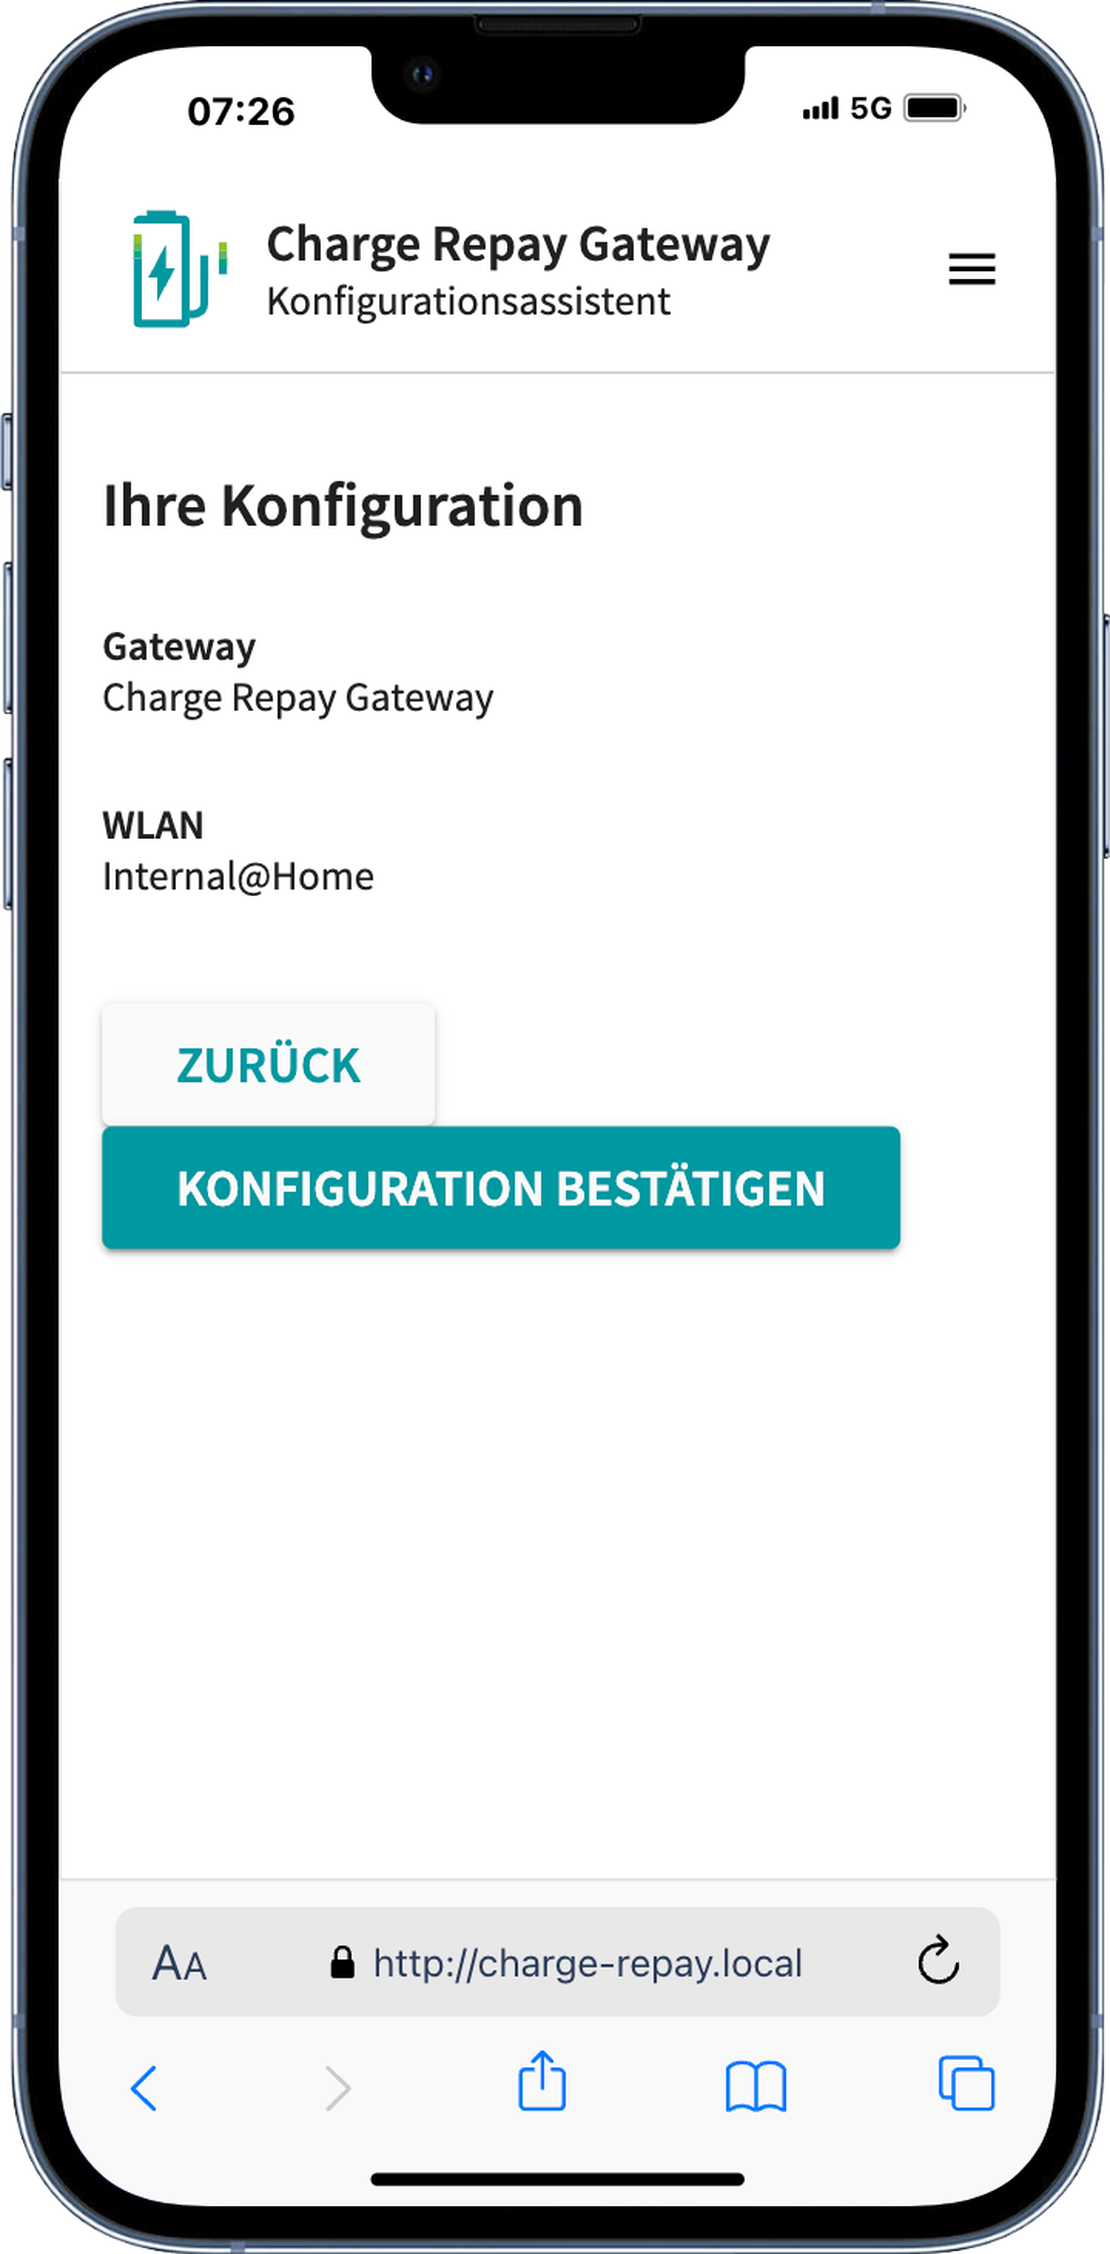 |
| 4. Finally, it will be checked whether the gateway is correctly connected to the internet. If this is the case, you will be redirected to the Charge Repay Service. If you are not automatically redirected, click the “WETIER ZUM SERVICE” button. | 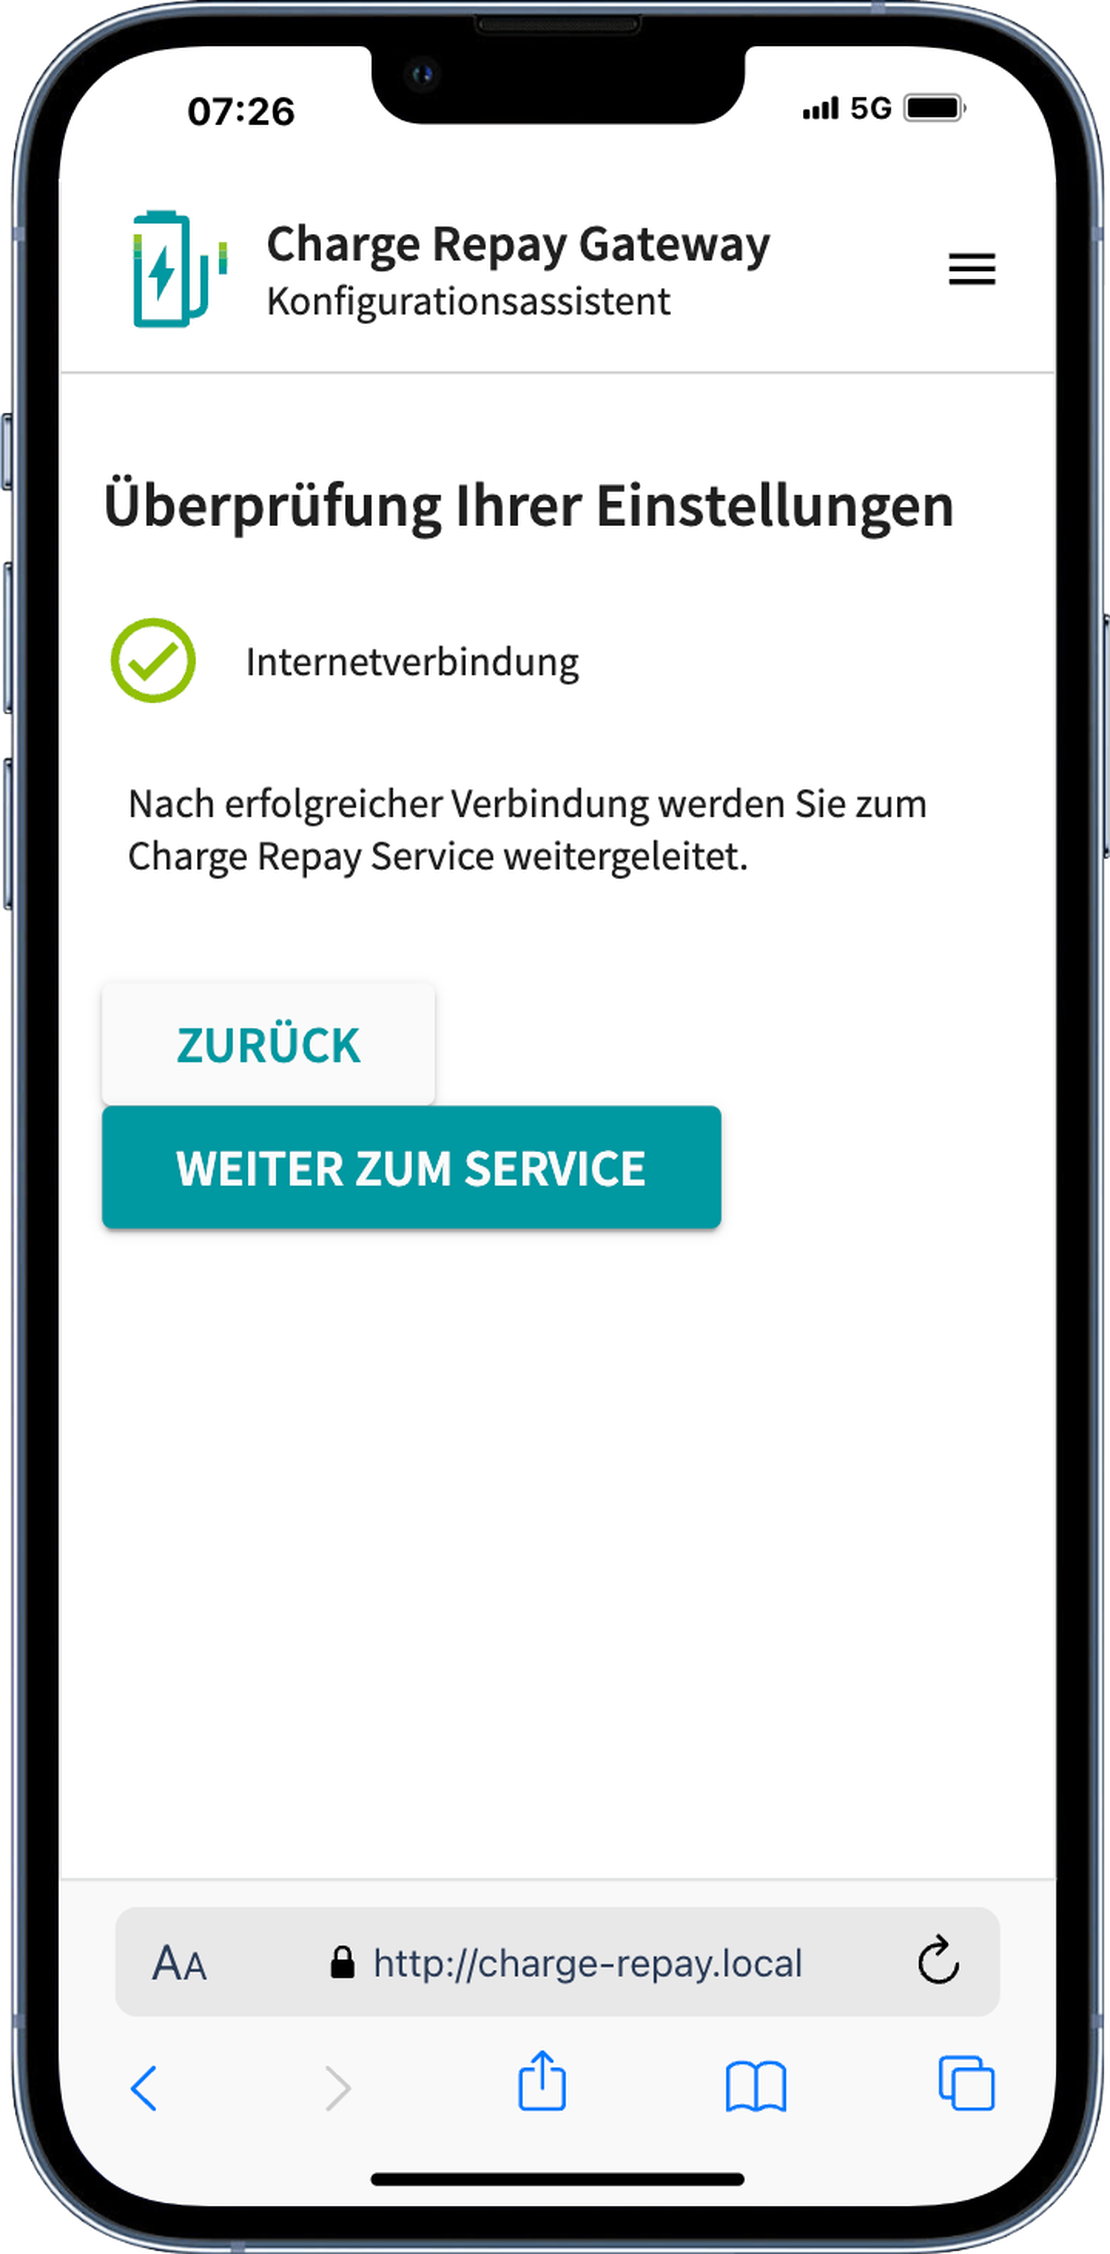 |
3. Registration in the Service
Finally, the gateway must be registered in the Charge Repay Service. Log in to the Charge Repay Service and go to the page Register. You will be automatically redirected to the correct page from the WiFi configuration.
Enter the UUID of your gateway on the page. This can be found on the back of your gateway or on the attached sticker. After registration, the gateway will be displayed as Online in the service after a few minutes.